ASP.NET Core Minimal API 初探
2024-07-01
筆記 ASP.NET Core Minimal WebAPI 的基本要點。

Minimal API is a new way to build APIs in ASP.NET Core. It is a lightweight and simplified way to create APIs that are easy to understand and maintain.
var builder = WebApplication.CreateBuilder(args);
var app = builder.Build();

app.MapGet("/hello", () => "Hello World!");
app.MapGet("/product", () => new Product(1, "Cup", 500));
app.MapGet("/badrequest", () => Results.BadRequest());


app.MapGet("/", () => "Hello World!");

app.Run();

public record Product(int Id, string Name, decimal Price);
Minimal APIs do not use Controllers by default; instead, they use parameters to inject services.
builder.Services.AddTransient<IMyService, MyService>();


app.MapGet("/endpoint", (IMyService myService) =>
{
    // Use the service
    var result = myService.DoSomething();
    return Results.Ok(result);
});
There two return types in Minimal API, IResult Type and Common Type.
IResult Type includes:
- Results.Ok
- Results.Created
- Results.NoContent
- Results.BadRequest
- Results.NotFound
Scenarios
Web API Backend
First, Install Microsoft.EntityFrameworkCore.Sqlite and Microsoft.EntityFrameworkCore.Tools NuGet packages.
<ItemGroup>
<PackageReference Include="Microsoft.EntityFrameworkCore.Sqlite" Version="8.0.6" />
<PackageReference Include="Microsoft.EntityFrameworkCore.Tools" Version="8.0.6">
<PrivateAssets>all</PrivateAssets>
<IncludeAssets>runtime; build; native; contentfiles; analyzers; buildtransitive</IncludeAssets>
</PackageReference>
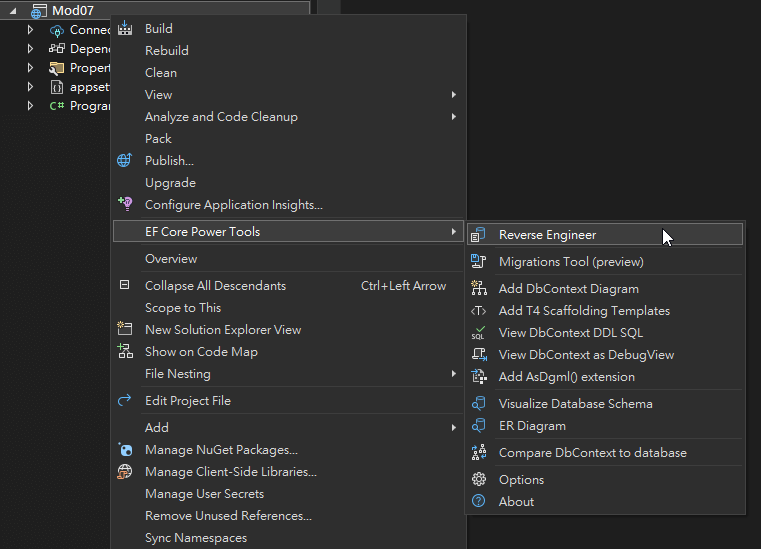
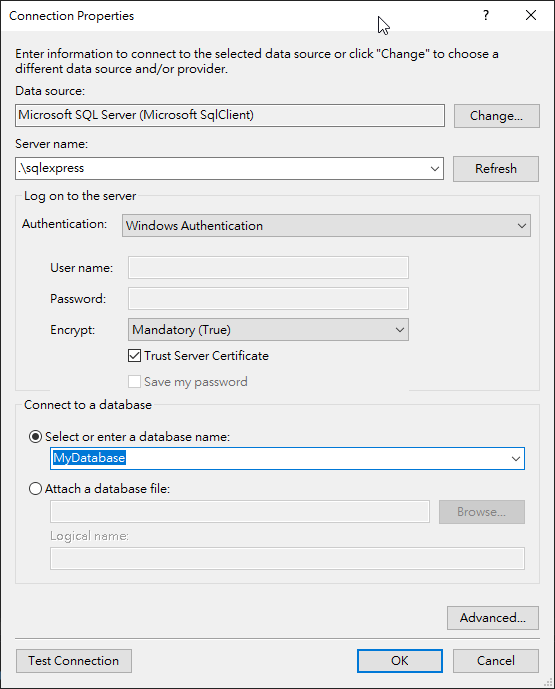
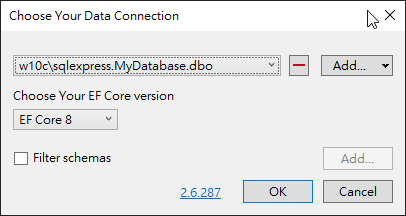
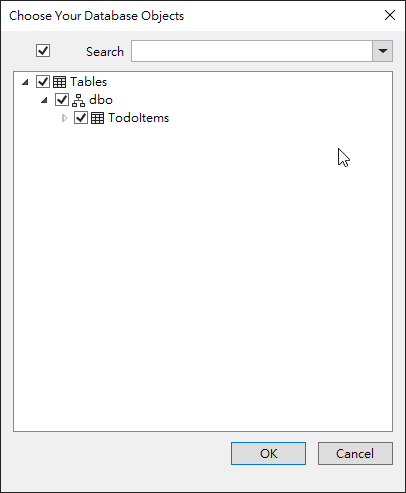
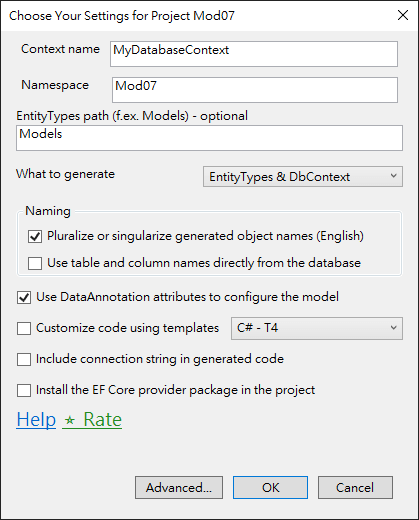
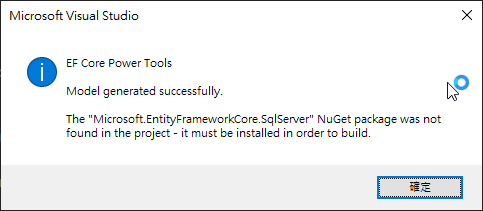
</ItemGroup>And then Reverse Engineer the database schema to a DbContext by EF Power Tools.
And setting connection string in appsettings.json.
{
  "ConnectionStrings": {
    "Default": "Data Source=app.db"
  },
  "Logging": {
    "LogLevel": {
      "Default": "Information",
      "Microsoft.AspNetCore": "Warning"
    }
  },
  "AllowedHosts": "*"
}
After that, we can use the DbContext in the Minimal API.
builder.Services.AddDbContext<MyDatabaseContext>(options =>
{
    options.UseSqlite(builder.Configuration.GetConnectionString("Default"));
});
And then, we can seed the database with some data.
public partial class MyDatabaseContext : DbContext
{
public MyDatabaseContext(DbContextOptions<MyDatabaseContext> options)
: base(options)
{
}
public virtual DbSet<TodoItem> TodoItems { get; set; }
protected override void OnModelCreating(ModelBuilder modelBuilder)
{
OnModelCreatingPartial(modelBuilder);
modelBuilder.Entity<TodoItem>().HasData(
new TodoItem { Id = 1, Name = "Buy ingredients", IsComplete = false },
new TodoItem { Id = 2, Name = "Prepare ingredients", IsComplete = false },
new TodoItem { Id = 3, Name = "Cook", IsComplete = false },
new TodoItem { Id = 4, Name = "Serve", IsComplete = false },
new TodoItem { Id = 5, Name = "Eat", IsComplete = false },
new TodoItem { Id = 6, Name = "Clean up", IsComplete = false },
new TodoItem { Id = 7, Name = "Store leftovers", IsComplete = false },
new TodoItem { Id = 8, Name = "Wash dishes", IsComplete = false },
new TodoItem { Id = 9, Name = "Put away dishes", IsComplete = false },
new TodoItem { Id = 10, Name = "Clean kitchen", IsComplete = false }
);
}
partial void OnModelCreatingPartial(ModelBuilder modelBuilder);
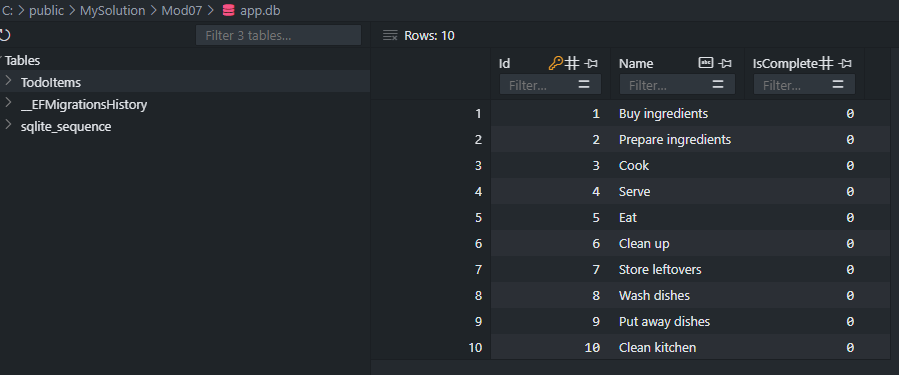
}Finally, we can add migration and update the database with Add-Migration and Update-Database commands.
And we can view db data with vscode sqlite extension.
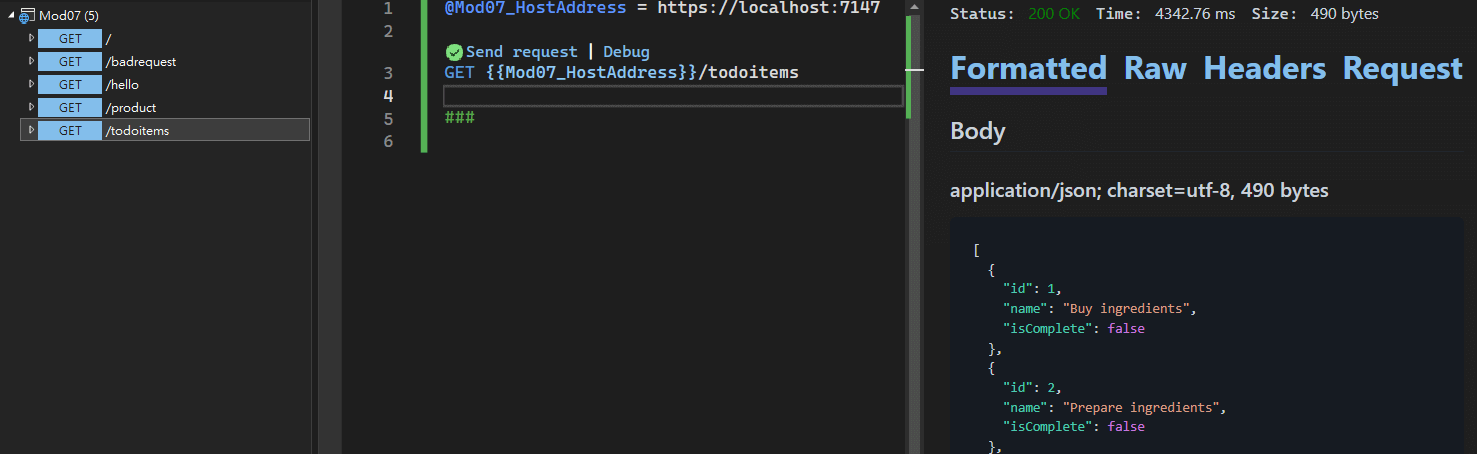
Add a new endpoint to get all TodoItems.
app.MapGet("/todoitems", async (MyDatabaseContext db) =>
{
    var items = await db.TodoItems.ToListAsync();
    return Results.Ok(items);
});
Use endpoint explorer to test the endpoint.
And we finish all CRUD operations in Minimal API.
app.MapGet("/todoitems/{id}", async (MyDatabaseContext db, int id) =>
{
    var item = await db.TodoItems.FindAsync(id);
    if (item == null)
    {
        return Results.NotFound();
    }

    return Results.Ok(item);
});

app.MapPost("/todoitems", async (MyDatabaseContext db, TodoItem item) =>
{
    db.TodoItems.Add(item);
    await db.SaveChangesAsync();
    return Results.Created($"/todoitems/{item.Id}", item);
});

app.MapPut("/todoitems/{id}", async (MyDatabaseContext db, int id, TodoItem item) =>
{
    if (id != item.Id)
    {
        return Results.BadRequest("Id mismatch");
    }

    // this operation will  update the context, ef will think new entity is existed
    db.Entry(item).State = EntityState.Modified;

    try
    {
        await db.SaveChangesAsync();
    }
    catch (DbUpdateConcurrencyException)
    {
        // must not use FindAsync or it will check from context
        if (!await db.TodoItems.AnyAsync(e => e.Id == id))
        {
            return Results.NotFound();
        }
        else
        {
            throw;
        }
    }

    return Results.NoContent();
});

app.MapDelete("/todoitems/{id}", async (MyDatabaseContext db, int id) =>
{
    var item = await db.TodoItems.FindAsync(id);
    if (item == null)
    {
        return Results.NotFound();
    }

    db.TodoItems.Remove(item);
    await db.SaveChangesAsync();
    return Results.NoContent();
});
👀 Watch out for Results.Created($"/todoitems/{item.Id}", item); the first parameter is the location of the created resource, and the second parameter is the resource itself.
⚠️Warning: why using await db.TodoItems.AnyAsync(e => e.Id == id) instead of await db.TodoItems.FindAsync(id) in Put method catch block ?
Because db.Entry(item).State = EntityState.Modified; will update the context, and ef will think the new entity is existed. If we use FindAsync, it will check from the context, and it will return the entity that we just updated. So we should use AnyAsync to check if the entity is existed in the database.
Source Code of Find in EF Core
/// <summary>
///     Finds an entity with the given primary key values. If an entity with the given primary key values
///     is being tracked by the context, then it is returned immediately without making a request to the
///     database. Otherwise, a query is made to the database for an entity with the given primary key values
///     and this entity, if found, is attached to the context and returned. If no entity is found, then
///     null is returned.
/// </summary>
After that, we can install swagger Swashbuckle.AspNetCore nuget packages.
  <ItemGroup>
    <PackageReference Include="Swashbuckle.AspNetCore" Version="6.6.2" />
  </ItemGroup>
// swagger
builder.Services.AddEndpointsApiExplorer();
builder.Services.AddSwaggerGen();
var app = builder.Build();
// if dev use swagger
if (app.Environment.IsDevelopment())
{
app.UseSwagger();
app.UseSwaggerUI();
}💡 The reason Minimal APIs in ASP.NET Core use AddEndpointsApiExplorer() for Swagger integration, but traditional MVC controllers do not explicitly require it.
- Minimal APIs: Require explicit call to AddEndpointsApiExplorer() to provide Swagger with the necessary information for documentation because endpoints are defined in a more manual and direct way.
- MVC Controllers: Do not require AddEndpointsApiExplorer() because the MVC framework automatically provides Swagger with the necessary metadata for documentation through its convention-based approach to routing and controllers.
And we add CORS to the Minimal API.
// add cors
builder.Services.AddCors(options =>
{
    options.AddPolicy("AllowAll", builder =>
    {
        builder.AllowAnyOrigin()
            .AllowAnyHeader()
            .AllowAnyMethod();
    });
});

var app = builder.Build();

app.UseCors("AllowAll");
app.Run();
Frontend Client Side
Add a new MVC project to the solution, and add a new controller action in HomeController.cs.
public IActionResult WebApiClient()
{
    return View();
}
Add a new view in Views/Home/WebApiClient.cshtml.
<h1>WebApiClient</h1>

<form class="row g-3">
    <div class="col-md-6">
        <label for="Id" class="form-label">Id</label>
        <input type="text" class="form-control" id="Id" name="Id" value="" />

        <label for="Name" class="form-label">Name</label>
        <input type="text" class="form-control" id="Name" name="Name" value="" />

        <div class="form-check">
            <input class="form-check-input" type="checkbox" id="IsComplete" name="IsComplete" />
            <label class="form-check-label" for="IsComplete">IsComplete</label>
        </div>
    </div>
    <div>
        <input type="button" id="btnGetAll" value="GetAll" class="btn btn-primary" />
        <input type="button" id="btnGet" value="Get" class="btn btn-primary" />
        <input type="button" id="btnInsert" value="Insert" class="btn btn-primary" />
        <input type="button" id="btnUpdate" value="Update" class="btn btn-primary" />
        <input type="button" id="btnDelete" value="Delete" class="btn btn-primary" />
    </div>

</form>
<hr />
<table class="table table-striped">
    <thead class="table-dark">
        <tr>
            <th>Id</th>
            <th>Name</th>
            <th>IsComplete</th>
        </tr>
    </thead>
    <tbody>
    </tbody>
</table>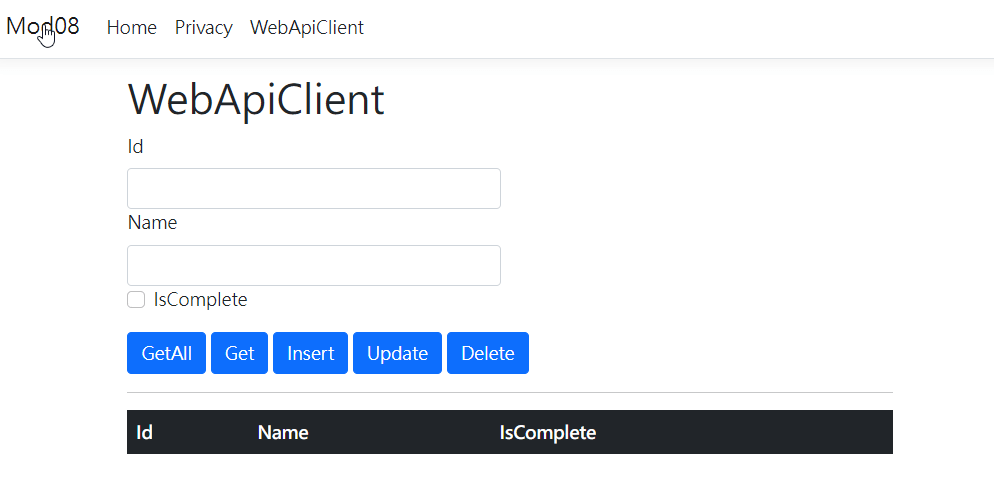
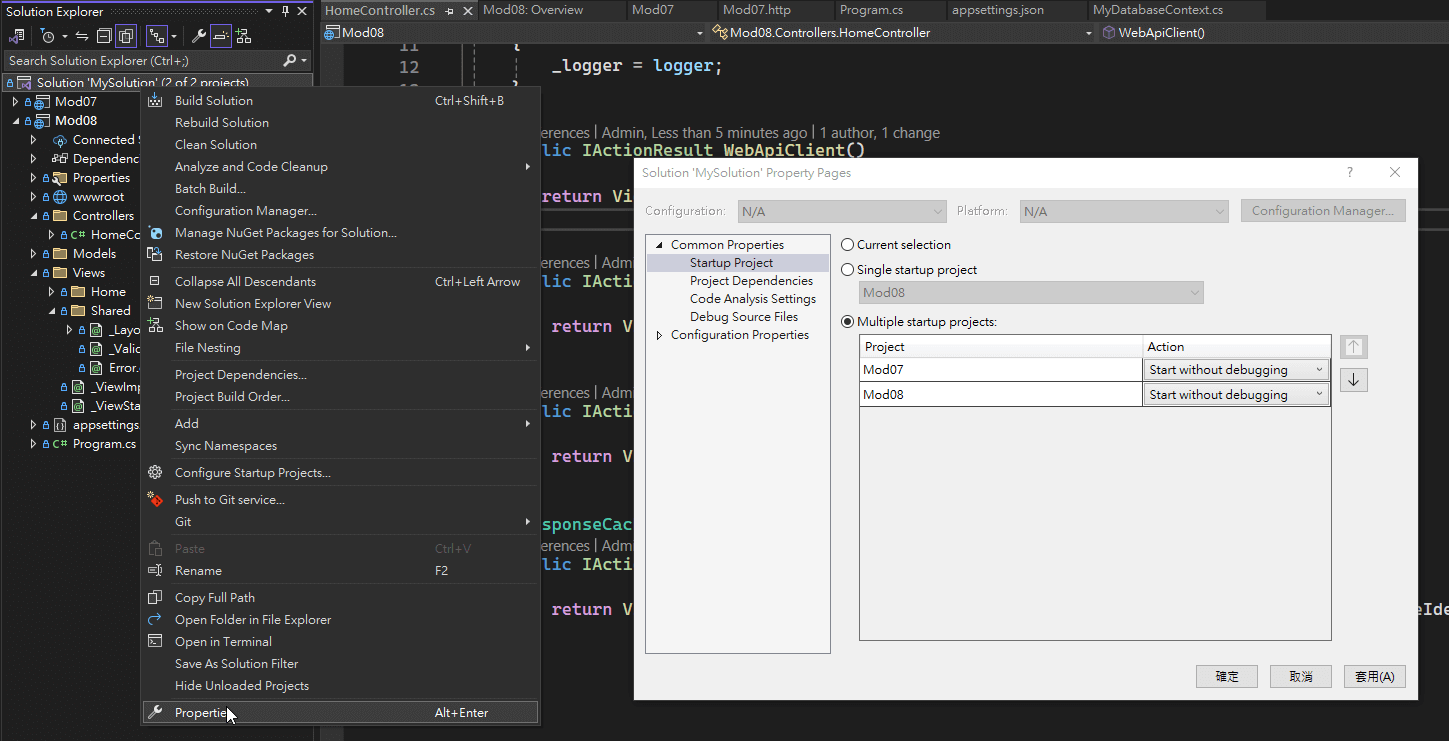
And setting multiple startup projects, let the WebAPI and WebApp run at the same time.
Now it is time to write the JavaScript code to call the Web API.
When it comes to calling the Web API from the client-side, we can use the fetch API or XMLHttpRequest to make HTTP requests.
What is the difference between
fetchandXMLHttpRequest?
fetch is a modern API for making network requests in the browser. It is more powerful and flexible than XMLHttpRequest and provides a more modern interface for working with network requests.
fetch supports promises and async/await, making it easier to work with asynchronous code. It also provides a more consistent and intuitive API for working with JSON data.
The JavaScript code will be cshtml file:
@section Scripts{
  <script>
    ...
  </script>
}
The core JavaScript code about calling the Web API:
// GET Data
fetch(url)
  .then(response => response.json())
  .then(data => {
     ...
  });

// POST Data
fetch(url, {
    method: "POST",
    headers: {
        "Content-Type": "application/json"
    },
    body: JSON.stringify({ name, isComplete })
})

// PUT Data
fetch(`${url}/${id}`, {
    method: "PUT",
    headers: {
        "Content-Type": "application/json"
    },
    body: JSON.stringify({ id, name, isComplete })
})

// Delete Data
fetch(`${url}/${id}`, { method: "DELETE" })
Web API Security
Check if my code follows the OWASP Top 10 web API standards, or suggest any cybersecurity improvements:
Input Validation: Validate the id parameter and other inputs to ensure they meet expected formats.
Authentication and Authorization: Add authentication and authorization checks to your endpoints to ensure only authorized users can access them.
Error Handling: Improve error handling to avoid exposing internal server details. Return generic error messages to the client.
Rate Limiting: Implement rate limiting to protect your API from abuse.
[Authorize] // Requires authentication
app.MapGet("/todoitems/{id}", async (MyDatabaseContext db, int id) =>
{
    if (id <= 0)
    {
        return Results.BadRequest("Invalid ID");
    }

    var item = await db.TodoItems.FindAsync(id);
    if (item == null)
    {
        return Results.NotFound();
    }

    return Results.Ok(item);
});

app.MapPost("/todoitems", [Authorize] async (MyDatabaseContext db, TodoItem item) =>
{
    // Validate item here
    db.TodoItems.Add(item);
    await db.SaveChangesAsync();
    return Results.Created($"/todoitems/{item.Id}", item);
});

app.MapPut("/todoitems/{id}", [Authorize] async (MyDatabaseContext db, int id, TodoItem item) =>
{
    if (id <= 0 || id != item.Id)
    {
        return Results.BadRequest("Invalid ID or Id mismatch");
    }

    db.Entry(item).State = EntityState.Modified;

    try
    {
        await db.SaveChangesAsync();
    }
    catch (DbUpdateConcurrencyException)
    {
        if (!await db.TodoItems.AnyAsync(e => e.Id == id))
        {
            return Results.NotFound();
        }
        else
        {
            throw;
        }
    }

    return Results.NoContent();
});

app.MapDelete("/todoitems/{id}", [Authorize] async (MyDatabaseContext db, int id) =>
{
    if (id <= 0)
    {
        return Results.BadRequest("Invalid ID");
    }

    var item = await db.TodoItems.FindAsync(id);
    if (item == null)
    {
        return Results.NotFound();
    }

    db.TodoItems.Remove(item);
    await db.SaveChangesAsync();
    return Results.NoContent();
});
Validate Data Example
// Add Validation Attributes
public class TodoItem
{
    public int Id { get; set; }

    [Required(ErrorMessage = "Title is required.")]
    [StringLength(100, MinimumLength = 3, ErrorMessage = "Title must be between 3 and 100 characters.")]
    public string Title { get; set; }

    public bool IsComplete { get; set; }
}

//  Implement the ValidateTodoItem Method
private List<string> ValidateTodoItem(TodoItem item)
{
    var validationResults = new List<ValidationResult>();
    var validationContext = new ValidationContext(item, serviceProvider: null, items: null);
    bool isValid = Validator.TryValidateObject(item, validationContext, validationResults, validateAllProperties: true);

    var errors = validationResults.Select(result => result.ErrorMessage).ToList();
    return errors;
}

// Use the ValidateTodoItem Method in Endpoints
app.MapPost("/todoitems", async (MyDatabaseContext db, TodoItem item) =>
{
    var errors = ValidateTodoItem(item);
    if (errors.Any())
    {
        return Results.BadRequest(new { Errors = errors });
    }

    db.TodoItems.Add(item);
    await db.SaveChangesAsync();
    return Results.Created($"/todoitems/{item.Id}", item);
});