Azure Speech Service Text To Speech
2021-08-26
介紹如何藉接 Azure Speech Service,將文字轉換為朗讀文字的語音檔,支援多國語語言,同時在聲調、語速都可以進行調整,聲音也相當擬人,不會有很明顯的機械音感覺。本次 API 介接使用 Python 進行示範,同時示範 Zero-Coding 的 Speech Studio 的使用。
說明
Azure Portal 建立 Speech Service
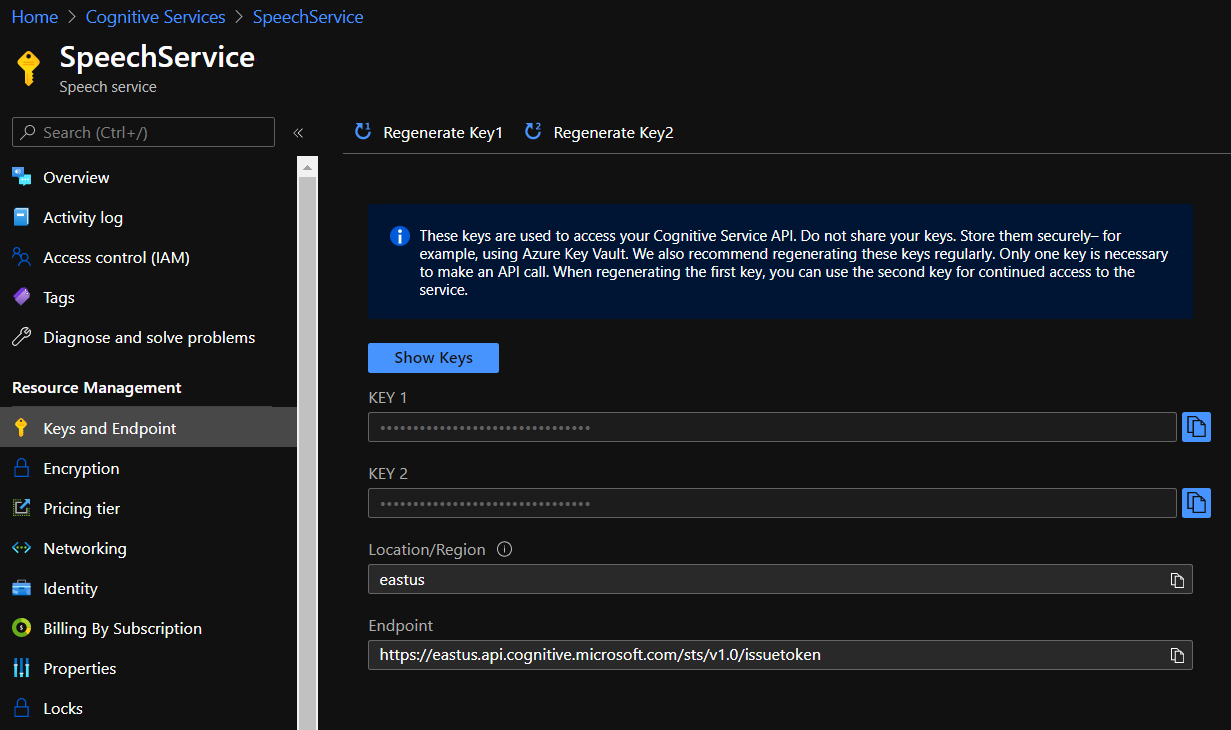
不論是自行開發程式碼介接或者是使用 Speech Studio 都必須先於 Azure Portal 上建立 Speech Service,並在介接時使用 Key。

安裝 Python Speech 相關的 SDK
pip install azure-cognitiveservices-speech設計 SSML
ssml.xml
SSMS 是 Azure 指定文字該如何轉換為語音的標籤語言,例如定義段落、中斷沉默、使用的人聲類型、語速、音調等。目前繁體中文尚不支援角色與情緒的支援,期待未來這些功能更為完善,提供使用者更多元的語音產生選擇 😀
<speak
  xmlns="http://www.w3.org/2001/10/synthesis"
  xmlns:mstts="http://www.w3.org/2001/mstts"
  xmlns:emo="http://www.w3.org/2009/10/emotionml"
  version="1.0" xml:lang="zh-CN"
>
  <voice name="zh-TW-HsiaoChenNeural">
    <prosody rate="40%" pitch="6%">
      <p>該如何驗證解決方案</p>
      <break time="1500ms" />
      <p>最好的方式就是將實際的情境需求應用於解決方案當中</p>
    </prosody>
  </voice>
</speak>使用 Python 介接 API
code.py
from azure.cognitiveservices.speech import AudioDataStream, SpeechConfig, SpeechSynthesizer, SpeechSynthesisOutputFormat
from azure.cognitiveservices.speech.audio import AudioOutputConfig

speech_config = SpeechConfig(
    subscription="ApiKey",
    region="eastus")

audio_config = AudioOutputConfig(filename="file.wav")


ssml_string = open("ssml.xml", "r", encoding="utf8").read()
synthesizer = SpeechSynthesizer(
  speech_config=speech_config,
  audio_config=audio_config)

result = synthesizer.speak_ssml_async(ssml_string).get()
stream = AudioDataStream(result)
stream.save_to_wav_file("file.wav")
其中 subscription 要輸入於 Azure 所建立的 Speech Service API Key,region 則是該 Service 建立時所選的地區。
Speech Studio
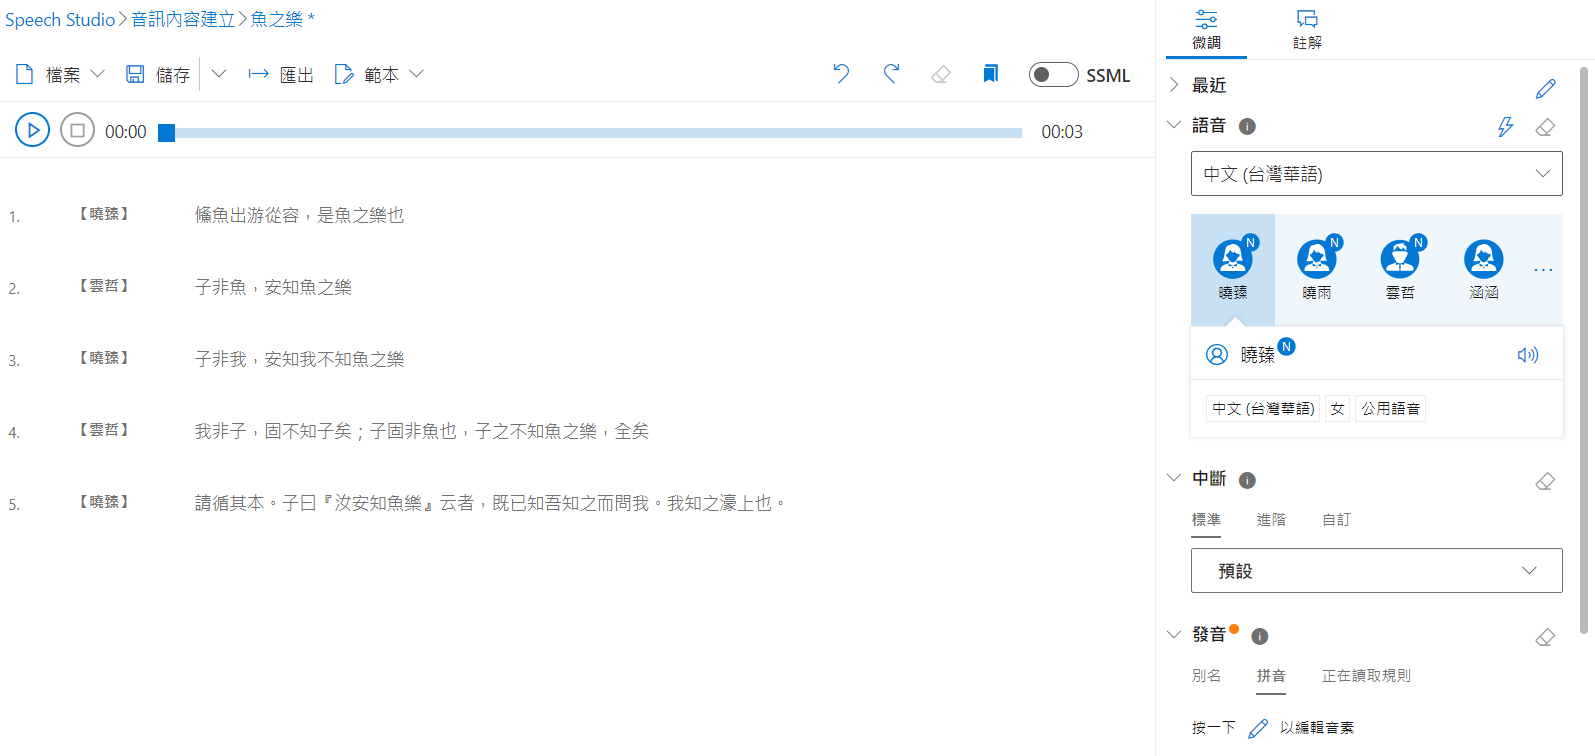
不需要寫程式碼的語音解決方案,同樣可以支援將資料以 SSML 處理,提供 UI 介面讓語音轉換的編輯上更為平易近人,同時也支援編輯檔的保存與匯出,在匯出上服務推薦使用 Azure Blob ,如果是匯出至本機限制 10 分鐘以內的音訊檔。

成果
參考資料
Cognitive-services-speech-sdk | GitHub
Synthesis Markup Language (SSML)
可以選擇使用的語音類型 | Language and voice support for the Speech service